18 February 2012

baby wreath


Hey all!!
So sorry it's been a while! With hubby away, I've been trying to get a lot of cleaning, organizing, Master's thesis work, and baby projects done! Not to mention getting the house ready for his arrival home again- so soon!! Anyhoo, I've had a lot of projects in the works, but hadn't gotten a chance to put finishing touches on a lot of them (or just haven't photographed them yet!).


But here's a project that I recently finished, and I'm SO excited to share- one of those things that actually turned out better than I imagined it! Hehe, and that rarely happens, so I'm super psyched! So this is a wreath for a baby's nursery :)

the only materials are...
wool yarn, "styrofoam" wreath, felt, scissors, needle, threads, and pretty pins, straight bins, and hot glue (to secure the yarn ends of the "baby" word)

there were really only a few steps to this wreath...
{1} wrap the wreath
{2} wrap the "baby" word
{3} stitch together various flowers
{4} pin everything to the wreath, and hang!

There's a few fun features here too...
  • all of the flowers are removable, so the wreath and yarn-wrapped "baby" can be reused for future projects or customized to different genders. The flowers on the wreath part are pinned in place. The flower on the "baby" word is attached with thread, so you can just cut the threads to remove. All flowers are one piece, so if you remove them, they won't fall apart or anything ;) You could also attach the flowers to hair clips for a fashionable baby (or mama!) accessory!
  • the "baby" word is not permanently attached to the main wreath, so you can easily remove it and put it elsewhere in the nursery (ie. bookshelf, wall, etc) for added decor :)
  • I got the idea for the "baby" word via Pinterest from Family Chic- I deviated from her tutorial a little, since I used a thick gauged floral wire and hot glued the ends
  • the flowers are from various tutorials around the web- all are made via cutting out some felt and stitching the petals together, super simple! if you google "felt flowers" you'll find a bunch of tutes :)
  • since all the flowers and word are temporarily attached, you could use the same wreath base for all sorts of occasions- switch out the word, switch out the flowers, the possibilities are endless ;)


So that about wraps up this project... hopefully I'll be back here regularly as I {finally} finish up projects and get them photographed! I have so much to share- decor projects, organizing, foodie stuff, and more!!

sharing here...
One Artsy Mama Catch a Glimpse Button Positively Splendid kojodesigns Making DelectableHome DIY projects and crafts The Girl Creative The DIY Show Off Today's Creative Blog Tip Junkie handmade projects

18 January 2012

just checking in

Hey ya'll!

I'm still here!! DH was home for the holidays, but now he's back at his mini-deployment- boo! I've been keeping busy around here, and I'll be bringing you some fun projects soon! Here's just a few of the upcoming things I'll be sharing with ya...
- Household 6 Notebook (aka. my home management binder!), including tons of printables!
- menu planning calendar, created from an old cookie sheet!
- nursery decor
- home organizing solutions
- my family command center
- and more!

So thanks for sticking with me, and I'll be back in full swing on here soon!
*huggs*
-Shauna

22 December 2011

easy DIY gift tags

Hey all!!! Wow, can you believe Christmas is only a few days away?! Well, as you can tell, things have been a bit quiet over here- I only have a short time with DH this holiday season before he has to go back to his mini-deployment, so needless to say I'm spending most of my time with him ;) Not to mention I've been a bit under the weather, so unfortunately a lot of time has been spent on the couch- boo.

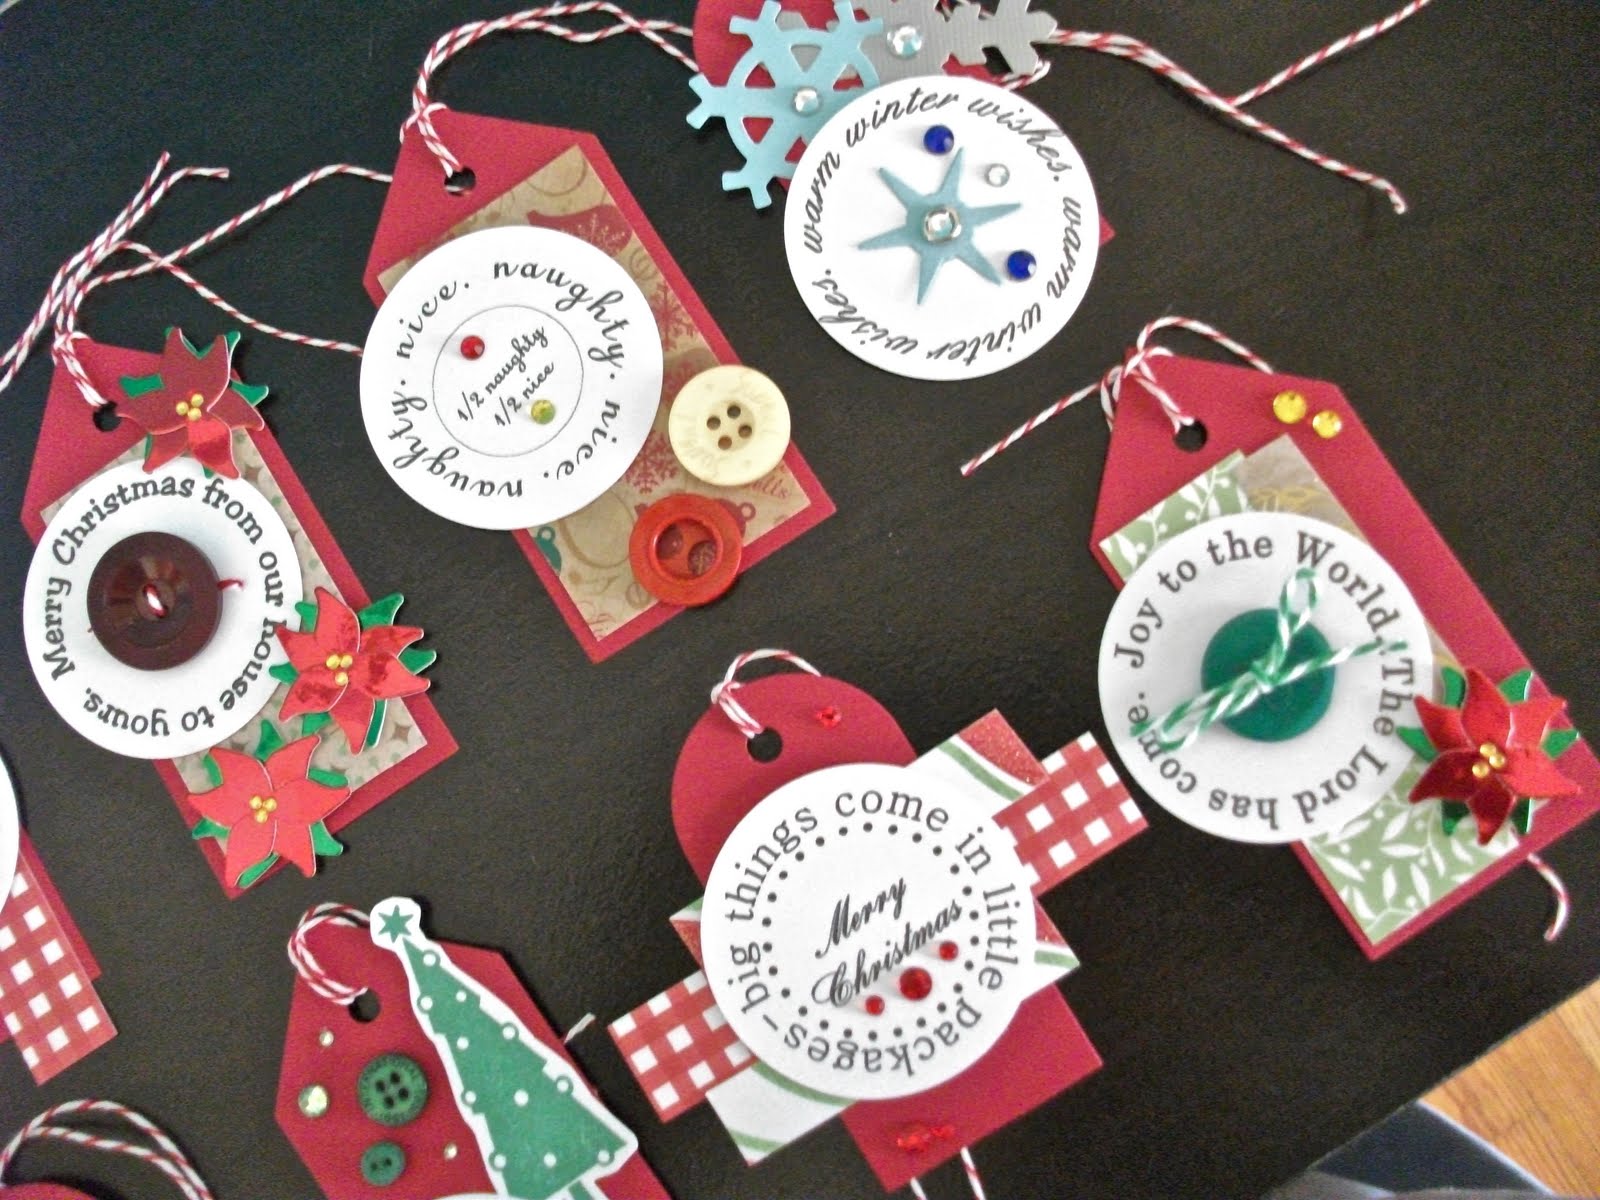
Anyhoo, I wanted to share these super quick and easy gift tags with ya'll!! This would make a great project to do with kids too :) The only ingredients I used are...
  • The Cutting Cafe digital stamps {cut out with a circle punch}
  • tag & snowflake punches
  • twine
  • buttons
  • rhinestones & rhinestone brads
  • cardstock & Christmas patterned paper scraps
  • leftover Christmas stickers
  • {and one leftover Christmas tree stamped image!}
I just kinda stuck things where they would fit essentially :) I think kids would have a blast using whatever crafting scraps and tidbits you have laying around! You could even use up scraps of wrapping paper for these! The possibilities are truly endless!

I may or may not be back on here before the new year, so if not, have a super
merry CHRISTmas


06 December 2011

12 Days of Christmas Countdown Calendar

Hi all!! I wanted to share my 12 Days of Christmas display with you :) My DH is coming home from his mini-deployment just in time to count down the 12 days of Christmas. So instead of a traditional Advent calendar {which we would have had to skip the first half of, or open the first half all on one day!} I decided to go with the "12 Days of Christmas" theme!

It's our first Christmas being just the two of us- previous Christmases DH was deployed or we were hosting guests so things were crazy! So our 12 Days of Christmas calendar is filled with goodies the two of us can enjoy together. We both love tea and coffee, so each day is filled with a special tea or coffee that we haven't tried before, or one that is a favorite of ours. I'm looking forward to opening them each night and settling down together on the couch to enjoy our hot beverages, perhaps while watching a Christmas movie ;)

The best part?? Since I had all of the materials in my stash, the only expense was the items to fill the pouches- $30 {and there's lots of extras of each tea/coffee, hehe}.

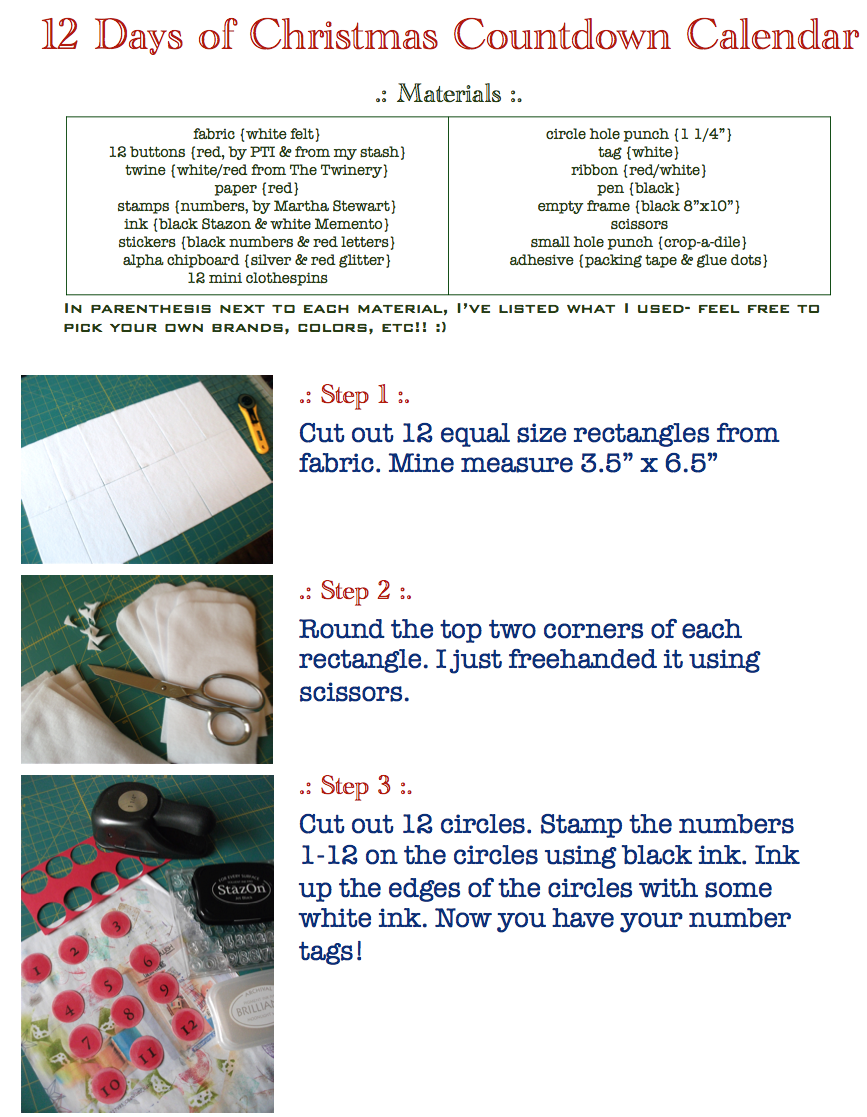
Below is a tutorial of how you can make one too! I've also included a link where you can download the whole tutorial in a PDF file. Enjoy!!


linking up here...
Todays Creative Blog Home Stories A2Z Tip Junkie handmade projects Organize and Decorate Everything A Crafty Soiree Somewhat Simple Party Button The DIY Show Off Catch a Glimpse Button One Artsy Mama  Creating Christmas at The Girl Creative Positively Splendid

02 December 2011

Christmas card

Hi all!! I'm back from my little vacation visiting family over the holidays, and thought I'd share with you our family Christmas card for 2011 :) Here's wishing you a very blessed month of celebrating Christ's birth!

I'll be back next week with baby shower decor & baby announcements - fun stuff!! :D